PVA glue - a tool popular in construction, repair, office work. With it, you can glue any paper, cardboard, it is suitable even for fabric, polystyrene and other light materials.
- Characteristics of PVA glue
- PVA glue paints
- PVA wallpaper varnish
- Decoupage
- Plasticine from PVA glue
- Lizun
- Papier mache
- Vase or ball of glue and thread
What can be done from PVA glue in children's art? There are many interesting recipes and workshops on making toys and educational crafts. PVA also has a number of other non-standard applications, for example, it is suitable for the manufacture of paints and varnishes at home.

Characteristics of PVA glue
PVA is an emulsion of polyvinyl acetate on water with the addition of plasticizers and modifiers. The product is practically odorless, looks like a viscous liquid of white color or with a slightly yellowish tint. PVA is a fireproof and environmentally friendly glue, it can be frozen and thawed without loss of properties.
PVA sticks together those surfaces that are well impregnated with water best of all - this is the basis of its working mechanism. The adhesive strength for such substrates is 400-550 N / m, depending on the type of glue. For crafts and any home experiments, the usual clerical (office) PVA is best suited. Also for gluing products you can purchase:
- PVA-MB Universal;
- PVA Household;
- PVA-M with reduced moisture resistance.

When thickening, the adhesive can be diluted with plain water to the desired consistency. To work with white paper, you should choose a tool without yellowish impurities (usually they are given by low-quality plasticizers). With the help of PVA, you can build a lot of interesting toys: plasticine-antistress, a ball of papier-mâché and much more.
to contents ↑PVA glue paints
Using PVA, they make a budget analogue of acrylic paints, which are then painted with Christmas toys, crafts, stained glass, or used in other types of creativity. To work, you need gouache of the right color and PVA glue, the latter is required to give strength to the finished coating. Also, thanks to glue, the paint will lie on different surfaces more evenly.
The procedure for the manufacture of acrylic paints is as follows:
- take 20 g of quality gouache;
- add as much PVA glue;
- mix the mass thoroughly until white streaks remain in it;
- if you want to make a light shade paint, introduce PVA in a volume of 40 g - this will only strengthen the finished coating.

PVA wallpaper varnish
To make “glue varnish”, a minimum of time and financial costs will be required. The finished product is environmentally friendly, does not emit harmful fumes, durable, quick-drying, reliably protects the wallpaper from scratching, other types of damage. Cons of PVA varnish is also there. Do not expect to get a glossy surface: after drying, the wallpaper will remain matte. If the canvases are glued unreliably to low-quality wallpaper glue, then after applying the varnish, they may peel off.
You need to start work with the preparation of the composition. You need to purchase a jar of glue of sufficient volume, then dilute the product to about the density of milk. It is necessary to pour water in small portions until the liquid reaches the desired consistency. The consumption of the finished “varnish” is approximately equal to the consumption of water-based paint.
After dilution, the liquid is poured into a convenient spray or used to apply brushes, rollers. The first layer should be very thin, which will not allow the wallpaper to get wet. After 5-10 hours, you can apply another layer, although the ideal option is to wait for a day. In general, a check of the degree of drying is carried out for sticking. Put your fingers on the wall, conclude: if the skin does not stick, moisture is not felt, you can perform a second layer. In total, 2-3 layers of liquid varnish are needed: the more they are, the stronger the coating will be.

Decoupage
By decoupage we understand the technique of transferring a picture that is on paper to various products. Thus, you can beautifully paint furniture, shoes, clothes, plates and other utensils, various souvenirs. To work, you need to prepare PVA glue, a brush, varnish, and also take an image on paper. The procedure is as follows:
- to process the surface of the product on which the drawing will be applied using sandpaper, first with coarse grain, then with fine (this is a tree, this preparation is not required for other materials);
- brush away all dust from the base, remove debris, wash away dirt, dry it;
- apply PVA glue to the surface where the drawing will be located;
- lay out a paper image, iron it so that it sticks;
- after complete drying, coat the base with varnish in 2 layers.
For decoupage, it is more convenient to use not pure but PVA diluted with water. If you do not dilute it, too thick glue will go down in strips, stains. In the case when the PVA was of poor quality, after a while the surface may turn yellow. An incorrectly selected topcoat often leads to the same consequences. It is best to buy adhesives of proven brands for decoupage and use water-based acrylic varnishes (glossy or matte - if desired).
to contents ↑
Plasticine from PVA glue
Handgam or smart plasticine, plasticine-antistress - resembling a rubber toy, which is easily flexed in the hands and takes different forms. Plasticine can be solid, semi-solid, it can be torn into pieces and glued again. This toy meets the properties of Newtonian fluid: its consistency depends on the applied force. Plasticine does not bother hands, furniture, things, safe for children.
You can buy smart plasticine in any toy store, stationery. It is also possible to do it yourself. Here is the order of work:
- pour into a PVA container from a 125 ml vial;
- add a little food coloring to get the desired shade;
- mix with a wooden stick until the disappearance of lumps, stains;
- introduce tetraborate (a pharmacy antiseptic drug) into the mass of sodium, and it must be added literally by a teaspoon, constantly mixing;
- after the introduction of the drug, the mass begins to thicken, it must be brought to the desired density, adjusting the amount of this substance;
- put the mass into a plastic bag, carefully knead with your hands so that it becomes very elastic, soft, then you can play with it.

to contents ↑Unlike purchased products, homemade plasticine does not last long: literally in 1-2 days it begins to dry out and harden. After that you can make a new portion of the "development".
Lizun
Lizun is a toy resembling smart plasticine, only more liquid, viscous, mucous. It can be prepared according to the recipe described above by introducing less sodium tetraborate. There is one more method for creating a slime (slime) based on PVA glue:
- squeeze into a bowl about a handful of shaving foam;
- introduce any dye, mix the mass well;
- add one tube of PVA glue (125 ml);
- introduce sodium tetraborate dropwise to thicken the mass;
- mix the lizun, apply for the game.

Papier mache
Using papier-mâché technique, you can make any Christmas tree decorations, souvenirs, baby development. Beginners are advised to try making papier-mâché of a simple form, for example, the fairy-tale hero Kolobok.
Have to take:
- a newspaper;
- white paper
- small balloon
- PVA.

First, the balloon must be inflated to the required size. After it should be carefully greased with glue, without leaving dry areas, stick 10 layers of torn newspapers, regularly smearing them with glue. Each layer should dry well before gluing the next. Then the last layer of pieces of white paper is glued. After complete drying, the crafts need to be painted, varnished. Instead of a ball, you can take a ball, as well as a toy of a different shape, but to extract it you will have to cut all the layers of the workpiece, and then glue them and make another paper-adhesive layer.
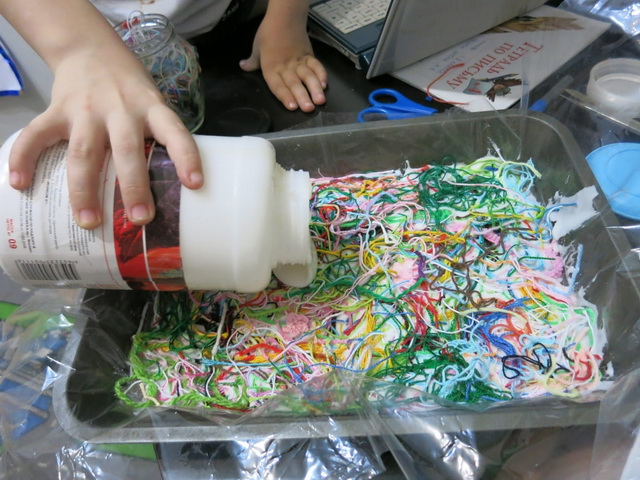
to contents ↑Vase or ball of glue and thread
Glue is useful for creating a beautiful spherical vase, an original lampshade. For such a craft, you will also need a balloon of the desired size (according to the expected dimensions of the product), PVA and thick, reliable threads.

The ball must be inflated, tightly tied with thread. Lubricate the PVA ball, then start wrapping it with threads. There can be several filament layers, the main thing is to coat them well with glue. When the threads dry, the ball must be pierced and carefully pulled out from below. If the hole in the product is too small, you can carefully trim it to the required size. Thread lampshade ready to use!


Papier-mâché is made on paste, starch glue. And the form is lubricated with vegetable oil. We sculpted molds from plasticine. Then they cut the shapes in half, halves were glued to a flat surface - glass or plywood - and pasted over with a newspaper, going to the base. The last layer is made from pieces of gauze, so the paint holds better. The dried halves were removed from the molds, glued, painted, glued or painted the remaining details. This is how we were taught in the puppet theater. No PVA.
We expand our skills and use PVA)