Wood is one of the most noble building and finishing materials. Its beautiful structure, rich and saturated color and a pleasant shade of eye captivated the hearts of many people. However, without proper care, wood very often loses its external qualities, becomes faded, gray and unattractive. But there is a way to return it to its former form, and this is the etching of wood.
- What is wood etching?
- Types of mordant for wood
- Natural mordants for wood
- Chemical etchings for wood
- Wood Etching Methods
- Soaking Wood Etching
- Etching wood using manual staining
- Wood etching at home, features
- Pitfalls - what's the big deal?
- Nature patterns
- Humidity level
- How to get a good pickle
- Mordant Blending
- Pickling intensity control
- Lighting
We are talking about processing the product with a special solution, which can either be purchased at the store (expensive, but reliable), or prepared on your own (cheap, but difficult to predict the result). There are many recipes for wood etching at home, and if you decide to do it yourself, then our useful life hack will come in handy.

What is wood etching?
The procedure is an impregnation of the fibers with a solution of salts, which provides deep toning. With the right approach, dyeing wood gives a uniform and rich color, allowing you to emphasize the natural texture of the fibers.
A properly prepared solution and its correct application help to give the wood additional light and water resistant properties. The product service life depends on this, which indicates the indisputable advantages of etching. But we should not forget that with improper and inaccurate processing, you can only aggravate the situation: the color is uneven and variegated, and the fibers swell too much and crack.
to contents ↑Types of mordant for wood
There are a large number of solutions for tinting, and each of them allows you to achieve a certain shade. It is also noteworthy that these compounds are both natural and chemical. Next - which of them can be used at home.
Natural mordants for wood

Their main advantage is safety, as they are prepared from natural ingredients. The most popular decoctions from:
- barberry root - gives the wood a yellow color;
- pharmacy alum and poplar branches - create a pleasant orange tint;
- alder and willow bark - they are needed for blackening wood of light species;
- husks from onions and apple bark - help achieve a natural brown tint.
Chemical etchings for wood
Here are replaced by a variety of substances. Some of them are freely available and can be purchased at any hardware store, while others will have to be searched.
The main thing to remember is that chemical mordants can be very corrosive, and therefore, when working with them, safety precautions must be observed: use gloves, a respirator and safety glasses.
Among the most effective chemical mordants are:
- sulfate and ferric chloride, copper, manganese;
- calcium chloride;
- ammonia;
- zinc sulfate;
- potassium permanganate, etc.

To achieve an unusual effect, some masters prefer to mix the above substances with natural ingredients. As a result of such experiments, the wood takes on a stunning color.
to contents ↑Wood Etching Methods
There are several generally accepted methods of tinting wooden products. Each of them has both advantages and disadvantages, so we consider it necessary to talk more about this.
Soaking Wood Etching
For this, deep and roomy enameled dishes are used. If we are talking about small wooden details, then you can safely use a bowl in which jam is usually cooked.
The tree is lowered into a prepared solution and kept in it for some time, after which it is taken out and dried. It’s difficult to predict the timing, because it depends directly on the breed. You need to poison until you achieve the desired result.
to contents ↑Please note that the water should be at room temperature, approximately +20 degrees Celsius. You can etch in a boiling solution, this will help to achieve a faster effect, but care must be taken.
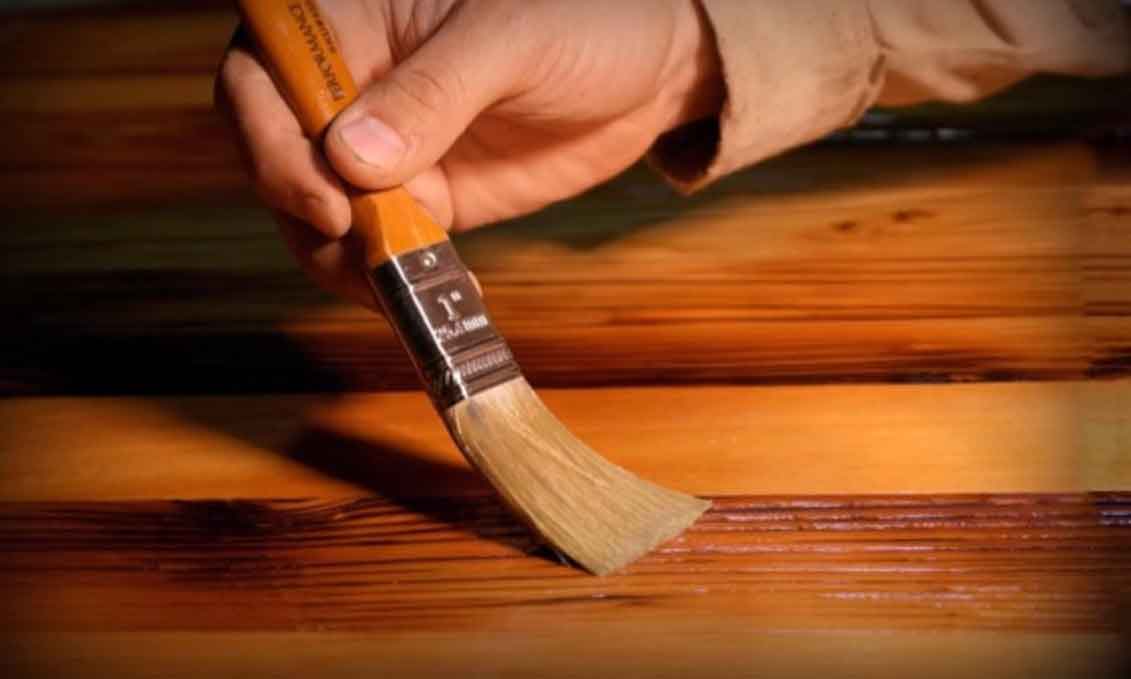
Etching wood using manual staining

This method is much simpler and more convenient, and also great for particularly large parts (if you need to tint furniture, floors, lining, etc.). Here you will need one of the following tools and fixtures:
- roller with medium pile;
- synthetic bristle brush;
- a tampon from an ordinary, but not oily rag.
The etching is applied in several layers: first across the fibers, and then along. To achieve a saturated and uniform color, it is necessary to process the wood several times, and each layer must completely dry before re-tinting.
to contents ↑Wood etching at home, features
An important factor is where exactly the wood products will be processed. It is not recommended to do this in the bathroom, as ugly stains may form on sanitary-ware products. It is advisable to poison the wood on the balcony and keep small children out of it.
Before proceeding to tinting, it is necessary to take into account several important factors on which the final result directly depends.
to contents ↑Pitfalls - what's the big deal?
To begin with, it is recommended to find out exactly how the wood will perceive the pickling. The effect directly depends on the presence and concentration of tannins in it, and all breeds react differently:
- ideal for coloring - chestnut, oak;
- less susceptible to tinting - birch, linden;
- conifers are unsuitable for etching (due to the presence of natural resins).
Please note that after successful pickling, the wood swells, which is a natural process. This should not be scared. As a final step, it is necessary to polish its surface.
to contents ↑Nature patterns
Deep toning does not create new patterns on wood, but only emphasizes the natural characteristic pattern, making it more contrasting and attractive.
The key to success is competent surface pretreatment. In order for the pattern to be pronounced, and the etching was carried out according to the intended scenario, it is necessary:
- completely clear the wood of dust and all kinds of debris;
- in rare cases, it is worth walking on it with a solvent or even a sandpaper, which will help get rid of paint stains and all kinds of defects.
The cleaned surface gives the pickling access to the fibers. Thanks to this, the tinting process is much faster and more efficient. Please note that the nature of the pattern largely depends not only on the type of wood, but also on the image of its sawing. With the radial method, for example, long wavy stripes are obtained.

Humidity level
It is not recommended to pickle raw wood, since the juices contained in it will reject the solution, which will not give any result. It is best to process well-dried wood, whose moisture level does not exceed 8%. To do this, dry the product in an oven (not under an open flame, of course), and carry out the etching procedure in a room with dry air.
How to get a good pickle
In order for the treatment to go as it should, and on the surface of the wood there are no defects, everything must be done according to the rules. If you are not sure about the result, then try using a water or oil stain, which is applied with an ordinary brush. This is the easiest and most effective way, but it limits the choice of color and tone.
Mordant Blending
You can combine solutions with each other, stain small pieces of wood and monitor the result. Such experiments will help you choose exactly the color that will be the most attractive.
Please note that you must not mix oil-based mordant with water. It is recommended to use solutions in equal mass fractions: when cooking, stock up with measured containers.

Pickling intensity control
Make sure that the wood does not absorb a lot of liquid, as this can lead to too much swelling of the fibers. The intensity of deep tinting is easiest to control with manual etching: you can compare the result layer by layer.
Lighting
Avoid direct sunlight on the wood surface during etching. It is best to work in the light of incandescent lamps. This will help to achieve an optimal result.
Now you know almost everything about wood etching at home, and so you can start tinting. But before dealing with furniture or decoration materials, practice with small pieces of wood and “fill your hand”. This will help you choose the perfect tone for processing, as well as create your own pickling recipe.

